How to Teach a Lesson on a Multi-Page Whiteboard
Teach a lesson on a multi-page whiteboard in myTpen Board. Keep Intro, Classwork, and Homework, then share those pages as a PNG or SVG with your students.
myTpen Team13 min read
- Board
- Teaching
- Whiteboards
- Workflows
The board fills up, you wipe it, and the opening question is gone when a student asks it again. A multi-page whiteboard keeps that opening on its own page. This guide is how to teach a lesson on a multi-page whiteboard when the period is about to start and the last diagram still matters. Board is the myTpen workflow for that job. The tutorial opens with "Start teaching and brainstorming from anywhere with myTpen Board".
This is for the teacher doing that work herself, including the many women who set the next board up after the school day is already over.
What a multi-page whiteboard is for#
One page holds the start of class. The next holds the work you do together. A later page holds what they take home. You switch pages. The page you leave still has the writing on it.
The narration says Board works whether class is virtual, in-person, or hybrid, and that it turns teaching into a collaborative visual experience. The lesson in the tutorial is astronomy. The canvas shows the Sun, the planets, a solar eclipse diagram, and a handwritten note in red: "What is the sun made of?"
myTpen is where we build academic workflows for teachers. We built workflows, not apps. The name on the front of the site is The EdTech Operating System. Board is one of the Educator Bundle tools, for when the lesson is something you draw, point at, and keep.
Pricing is not listed on the site. Create a free account at mytpen.app and open Board with the lesson in front of you. When a topic should play as a narrated video, use Lessons. When the question is already a photo, use Answers. Other guides live in the Knowledge Hub.
An online whiteboard for teachers, in the room or on a screen#
An online whiteboard for teachers has to work on the weeks when class is not one kind of room. The narration puts virtual, in-person, and hybrid on the same board. A digital whiteboard for hybrid classes, in this tutorial, is that canvas: you prepare the pages once, and you teach from them wherever that class is meeting.
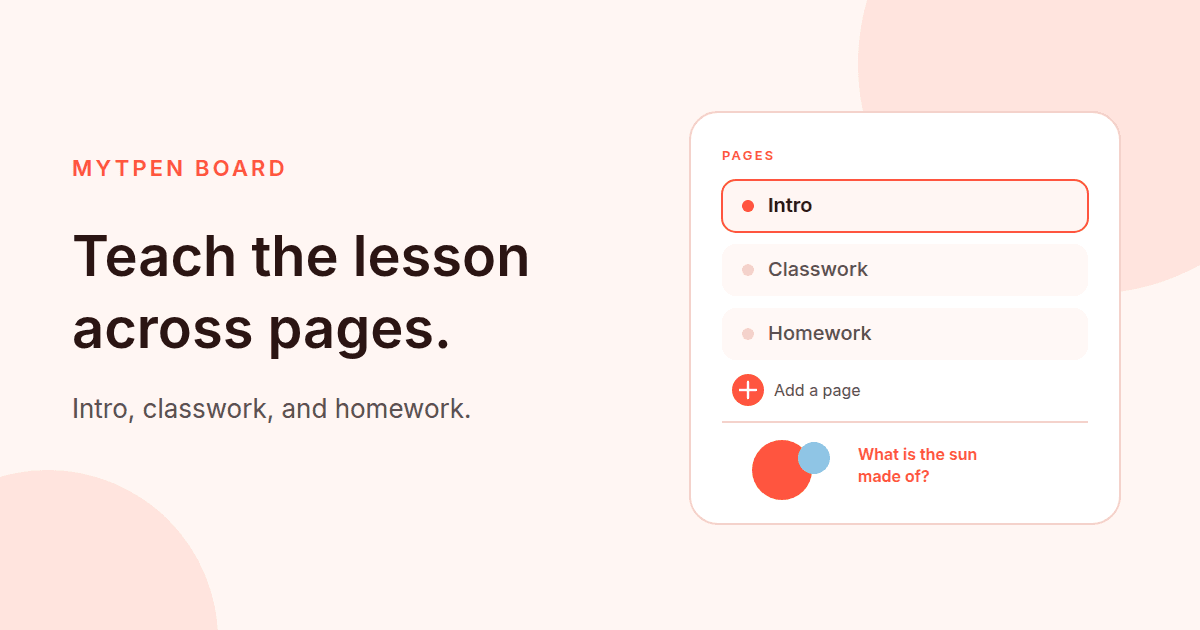
The pages are how the lesson stays in order. The tutorial names them Intro, Classwork, and Homework. You can leave the opening on Intro, draw on Classwork, and keep a question on Homework, then come back through the page list.
A shared board with other people is a separate line in the narration. You can invite students, or people from other teams, to collaborate, and no login is required. The narration says this feature is available on request. The tutorial does not show the invite screen, so the steps below stay with the pages, the tools, and the export menu that the video does show.
What you see on the Board#
The page manager sits at the top left. The dropdown opens a menu titled "Pages". In the tutorial the pages are named Intro, Classwork, and Homework. A plus control adds a page. Each page has a three-dot menu. That menu shows Duplicate, Move up, and Delete. The narration says you can rename a page, duplicate it, move it up or down, or delete it.
The bottom toolbar shows Present, Pen, Highlighter, Shapes, Laser, Select, and Pan. Shapes opens a grid of shapes. The pen tool's keyboard shortcut is D. The tutorial lists Present on that toolbar. It does not open Present, so this guide does not describe a presentation view.
A hamburger menu lists Edit, View, and Export, then Insert embed, Upload media, Preferences, and Keyboard shortcuts. Export lists SVG, PNG, and JSON, and a Transparent toggle. Insert embed is marked Ctrl I. Upload media is marked Ctrl U. The narration says you can add images, shapes, or even websites onto the board canvas.
On the right, a properties panel holds the ink. The colors in the tutorial are red, green, blue, yellow, light blue, purple, black, and white. There is an opacity slider, line styles for solid, dashed, and dotted, sizes marked S, M, L, and XL, and shapes.
At the bottom left, a zoom widget shows a mini-map, a slider, and plus and minus controls. The tutorial's example reads 46%.
How to teach a lesson on a multi-page whiteboard#
Watch the tutorial once, then set up the lesson you are about to teach.
- Create a free account at mytpen.app if you do not have one yet.
- Open Board. The opening line is "Start teaching and brainstorming from anywhere with myTpen Board".
- Open the Pages menu at the top left. Keep a page for the opening, one for the work in class, and one for what goes home. In the tutorial those names are Intro, Classwork, and Homework. Use the plus control when you need another page.
- Open a page's three-dot menu when it needs a copy, a new place in the list, or to be removed. The menu shows Duplicate, Move up, and Delete. The narration also says you can rename a page and move pages up or down.
- Press D for the pen, or pick the highlighter, a shape, or the laser from the bottom toolbar. Set the color, the line, and the size in the properties panel.
- Write the lesson on the page you are on. In the tutorial that is the Sun, the planets, a solar eclipse, and the red question "What is the sun made of?"
- When someone needs a copy of the board, open the hamburger menu and choose Export. The narration says to export as PNG or SVG and share that with students. The tutorial shows the menu. It does not show the file finish downloading.
Keep each part of class on its own page#
A full canvas used to mean an eraser. The page list is the other move. Intro stays when you open Classwork. Classwork stays when you open Homework. The earlier writing is still there when a student asks you to go back.
Duplicate makes a second copy of a page, which is useful when the diagram should appear once clean and once with the notes. Move up changes that page's place in the list, and the narration says pages can move up or down. Delete removes a page you do not need. Rename, which the narration includes, is how a page gets a name like Intro, Classwork, or Homework.
| Page the tutorial names | What you can keep there |
|---|---|
| Intro | The opening, still there after you move on |
| Classwork | The diagram and the notes from the period |
| Homework | The question they take with them |
The plus control adds a page when the lesson grows. The Sun can stay where you drew it while the eclipse gets a page of its own.
Write the way you would on a physical board#
The pen is the tool you will hold. Press D. The highlighter marks a line you want the class to find again. Shapes opens a grid, so a circle for the Sun or a box around a label is a chosen shape. Select and Pan move you around the canvas.
The properties panel is where the mark changes. Pick a color from the set in the tutorial: red, green, blue, yellow, light blue, purple, black, or white. The red question in the astronomy lesson is the kind of line a second color is for. The opacity slider softens a stroke. Solid, dashed, and dotted are the line styles. S, M, L, and XL are the sizes. Shapes are in that panel as well as in the toolbar grid.
A whiteboard with a pen tablet#
Handwriting wants a pen. The narration says that if you are not using the myTpen Board app on a touch device, connect a myTpen Surface pen tablet or a Wacom pen tablet for better handwriting, and that those tablets are available from the myTpen E-store. That is the line in the video. This guide does not add a date or a price.
A whiteboard with a pen tablet is for the writing itself: the question in red, the labels on the eclipse, the note you would have put on a board at the front of the room. On a touch device, the narration points you to the myTpen Board app instead.
Point at the page, then put a picture on it#
The laser sits on the bottom toolbar with the pen and the highlighter. The tutorial recommends it in online teaching, to guide all participants. You can point at the Sun, or at the red question, while the class watches. The laser is the pointer. The pen is what stays on the page.
The narration also says you can add images, shapes, or even websites onto the canvas. The hamburger menu shows Insert embed, with the shortcut Ctrl I, and Upload media, with the shortcut Ctrl U. An image can sit under the handwriting. A website can sit on the board from Insert embed. The tutorial names those controls. It does not walk through a finished embed.
Zoom lives at the bottom left: a mini-map, a slider, and plus and minus. The tutorial shows the zoom at 46%. Use those controls when a label has to be readable, and again when you want the whole diagram.
Export the whiteboard as PNG or SVG#
When the period ends, the narration says to export the board as PNG or SVG and share it with students. Open the hamburger menu and choose Export. The menu lists SVG, PNG, and JSON, and a Transparent toggle. PNG is a picture you can send. SVG is the other format the narration names for sharing. The tutorial shows that menu and does not show the download finish, so open the file on your own machine before you send it.
The save icon opens "Save to", with a myTpen DRIVE option. The screen says that option is available exclusively to users with an active subscription to the myTpen Drive app. This guide does not list a price. The share the narration describes for students is the PNG or SVG from Export.
Where Board sits next to Lessons and Answers#
Board is the canvas: pages, ink, a laser, and a file you can share. Lessons plays a narrated video from a topic, and you can export that lesson as a PDF. The guide is How to Turn Any Topic into a Narrated Video Lesson in Minutes. Answers reads a question from a photo and returns a final answer and the steps. The guide is How to Make an Answer Key from a Photo.
Draw the lesson on Board when the class needs to watch it come together. Play a narrated explanation in Lessons when the topic should be heard. Use Answers when the question is already a picture and you need the working before you teach it. They are workflows in The EdTech Operating System. More writing for teachers is in the Knowledge Hub. Account questions are on the FAQ, and support is there if something blocks you.
Where it fits in your workflow#
Board belongs to Lesson Teaching and to Instant Doubt Solving. You brainstorm a topic the class will keep, or you explain a question and solve it where everyone can see the working.
Lesson Teaching runs in this order.
- Lessons narrates the lesson.
- Board is where you brainstorm the topic.
- Save the notes to Drive.
- Notice Board broadcasts the lesson notes and the material links.
- Survey collects confirmation that everyone can access the materials and understood the lesson.
- Use what comes back to improve the teaching.
Instant Doubt Solving is the shorter path.
- Answers takes a photo of the question and returns the step-by-step explanation.
- Board is where you explain it and solve it.
- Export the notes and share them with students.
Frequently asked questions#
How do you teach a lesson on a multi-page whiteboard?#
Open the Pages menu and keep a page for each part of class. In the tutorial the pages are Intro, Classwork, and Homework. The plus control adds a page. The three-dot menu shows Duplicate, Move up, and Delete, and the narration says you can also rename a page and move pages up or down.
Is an online whiteboard for teachers only for a remote class?#
The narration says Board works whether class is virtual, in-person, or hybrid. You prepare the pages once and teach from them in the room or on a screen.
How does a multi-page whiteboard keep the earlier work?#
You add a page instead of clearing the one you are on. Intro stays when you open Classwork. Classwork stays when you open Homework. You return through the Pages menu.
How do you use a whiteboard with a pen tablet?#
The narration says that if you are not using the myTpen Board app on a touch device, connect a myTpen Surface pen tablet or a Wacom pen tablet for better handwriting. It says those tablets are available from the myTpen E-store. The pen tool on the board uses the shortcut D.
How do you export a whiteboard as PNG for students?#
Open the hamburger menu and choose Export. The narration says to export the board as PNG or SVG and share it with students. The menu also lists JSON and a Transparent toggle. The tutorial shows the menu and does not show the file finish downloading.
Can students collaborate on the board without a login?#
The narration says you can invite students, or people from other teams, to collaborate, that no login is required, and that this feature is available on request. The invite screen is not in the tutorial.
When should you use the laser during online teaching?#
The tutorial recommends the laser in online teaching, to guide all participants. It is on the bottom toolbar, with the pen, the highlighter, and the shapes.
Which app do you open after Board?#
Save the notes to Drive, then broadcast the lesson notes and material links on Notice Board. Survey is where students confirm they can access the materials and understood the lesson. When the question came in as a photo, export the notes and share them with students.
What we mean by a mighty teacher#
The mission is to make teachers mighty again. The tutorial closes with "You're not average anymore. You are a mighty teacher." Mighty, here, is practical. The opening of the lesson can still be on its page when the homework question is written, and a student who missed the drawing can receive a PNG or SVG.
We built workflows, not apps. You open Board, name the pages, and teach. myTpen is backed by Google and partnered with Coursera. The lesson stays yours, and so does the order of the pages.
Become mighty again.
Try it on the lesson you are about to draw#
Pick the class that usually fills the board and then loses the opening. Open Board. Name a page Intro, a page Classwork, and a page Homework. Write the first question on Intro, and leave it there when you move on.
Create a free account at mytpen.app.
Create a free account
Open myTpen and start with the workflow you need before the next class. Pricing is not listed publicly.
Create a free account